Exercise Title: Portrait Analysis
Purpose: Find settings that you are comfortable with in getting great portrait shots so you only worry about guiding your model and not being concerned about the gear
Method:
You will need the following:
- Pen and paper to create a plan
- A model (human), with a lot of patience
- A chair or stool you can easily move around
- Lenses with a variety of focal lengths
- Access to a space with a large opening. I’d normally say a garage is ideal, yours is a little congested though so if you can find a model who happens to have a decent size garage that would be perfect
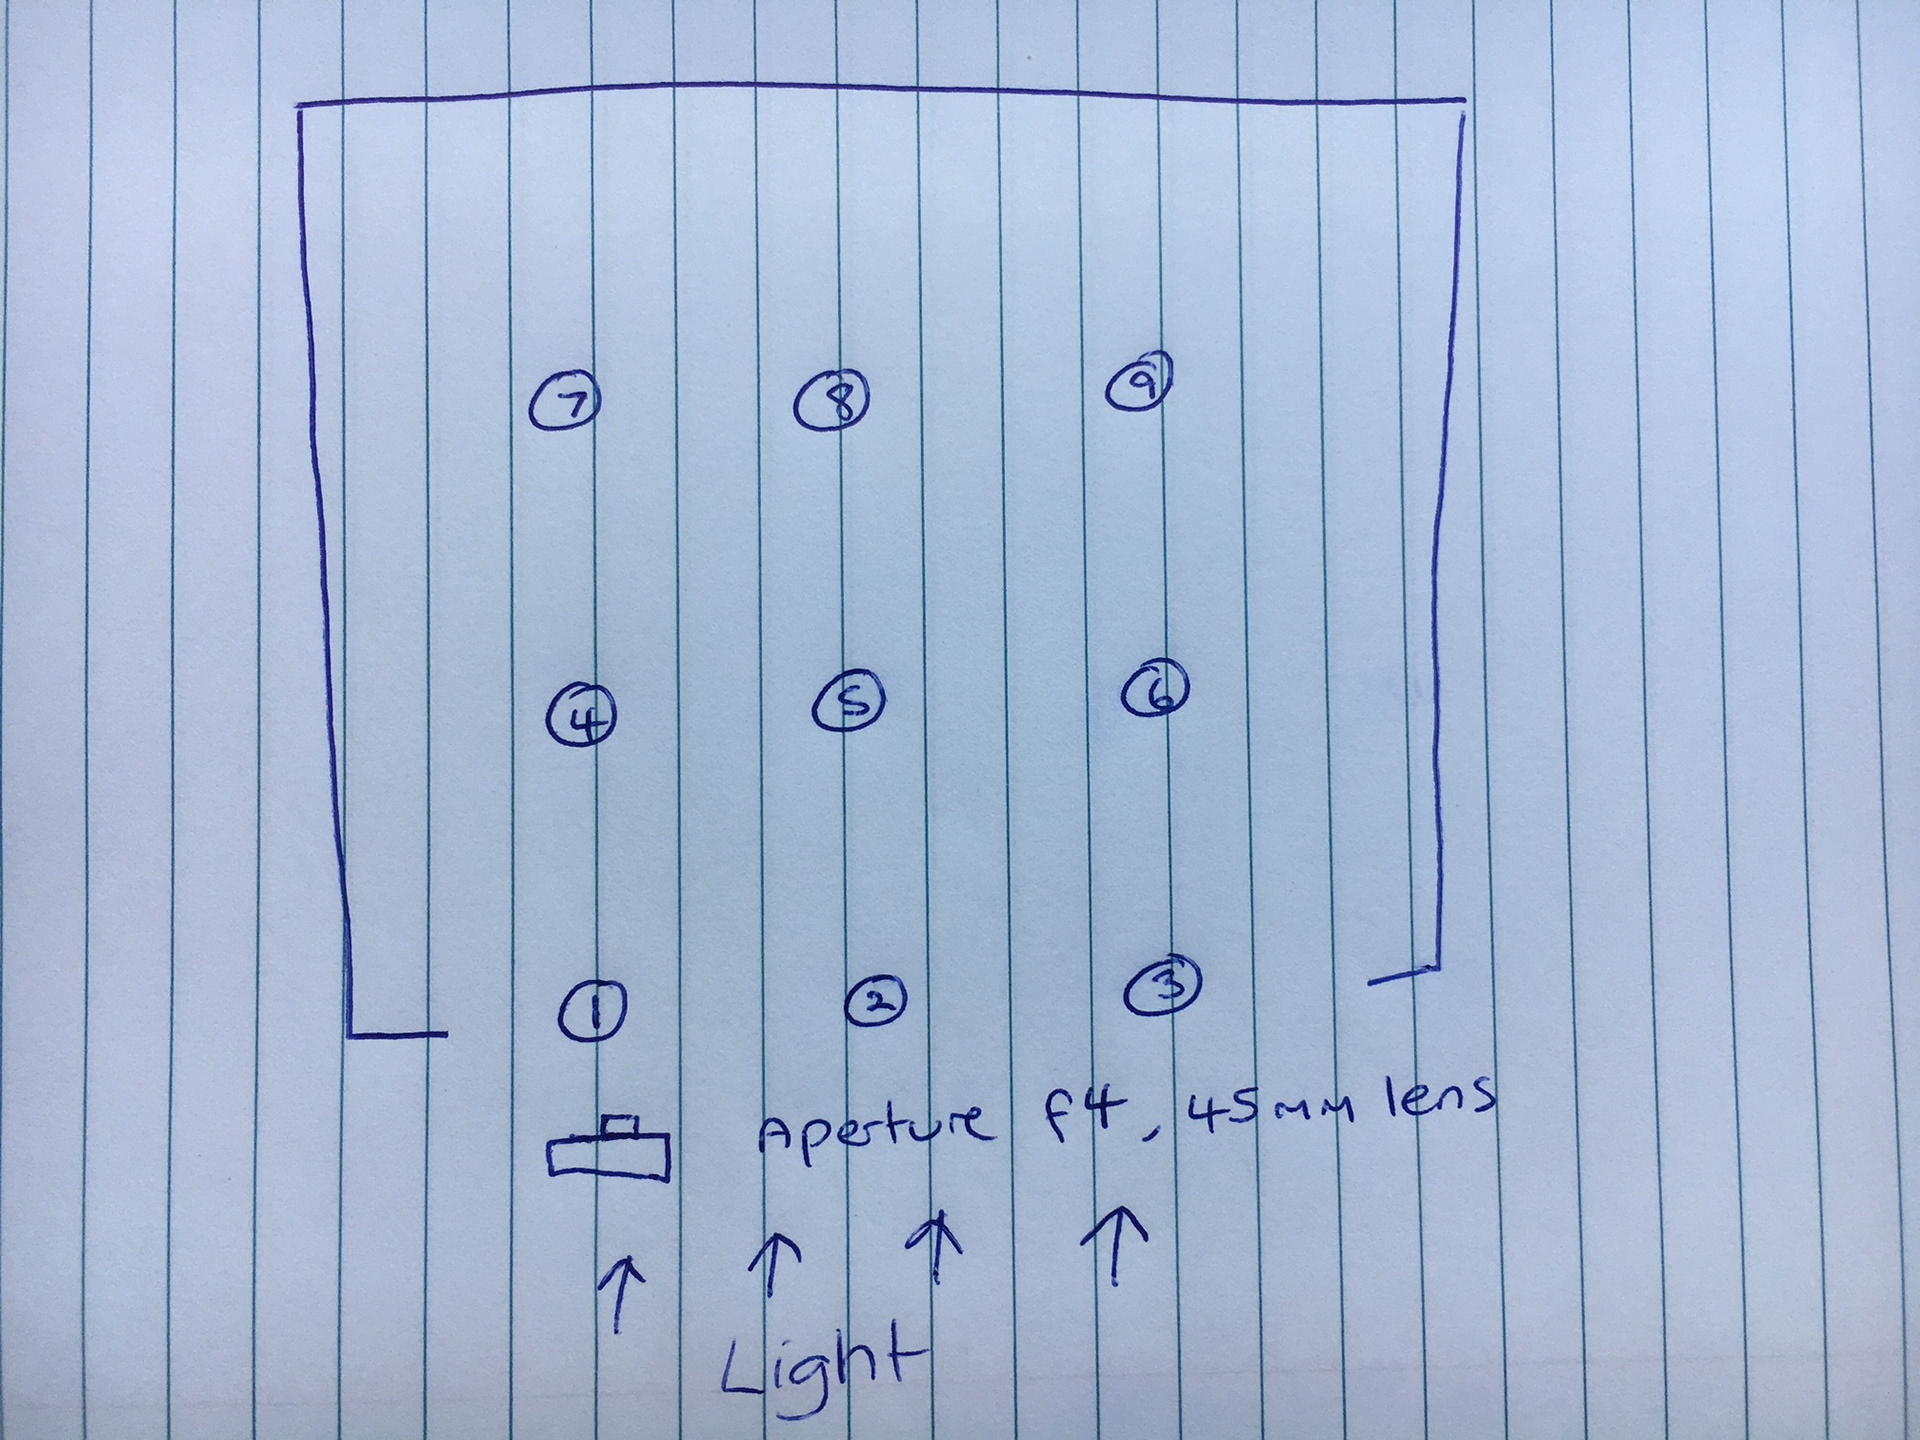
Before you start taking images you need to set out a plan (see below for example). Once you have the plans then you can do the following:
- Take a single image of the model correctly exposed at each location on your plan. If the exposure is not correct then delete the image and take another. The key is to have one image at each location marked on your plan correctly exposed and in order. It does not matter about directing the model at this stage other than to look at the camera.
- Carefully review the images against your plan and see what model placement gives you the light that you like best
- Now put the model in your favourite locations and you can start to work with them
For each location:
- Take an image with a variety of focal lengths
- For each focal length take one image from below their eye line, one straight on and one from above…..this is where the moveable chair comes in handy for them to sit on
- Now review those images on the computer and work out which focal length you prefer and what angle relative to the models eyes you prefer
This first stage is all about getting the building blocks together so that you know which location relative to available light will give you the result you like and what position they need to be in to give you the best result with your preferred focal length.
Once you are happy with all of that then you can get the model posing for you. You’ve already done a fantastic job on this part with Bec so I’ll just give you a few guidelines to consider: -
- Always stay positive even if the result on your camera looks awful
- Be aware of where the eyes are in the image. If you like them centre, then have your focal point set up to be centre, if you like them in the top third then move your focal point to that level.
- The eye closest to the lens should be in focus. Not only is this good for competition, it really does look better for the majority of images
- A model can be in one three modes:
- Direct where they are staring straight down the lens
- Indirect as if they are looking over your shoulder or out of frame at something else the viewer is not privy to
- Introspective where they are looking at a part of themselves, ie hands holding a glass of wine
Analyse: For each image you have selected describe why it makes you feel the way it does.
Feedback:
This was a tough and detailed exercise that I hope has given you a bit more understanding of working with natural light and how the placement of the subject can dramatically alter the final look you get. The better you become at seeing these opportunities the easier you will find it to get great portraits. Remember when editing that we guide the viewer by use of sharpness, contrast and brightness. Adjusting your image subtly can yield very different results.